Cork Connect Community

Your Guide to
7 Days to Die

Three steps to join the horde night with your crew.
Buy the game, install the mod pack, then connect.

Begin Your Journey
Buy & Install 7 Days to Die
Install Mods
Join the Server
Step 01

Buy & Install 7 Days to Die

7 Days to Die is available on Steam for PC. If you already have it installed, skip ahead to Step 2.

1

Download & Install Steam

Steam is the platform 7 Days to Die runs on. If you don't have it, download the Steam installer from steampowered.com, run it, and create a free account.

2

Purchase 7 Days to Die on Steam

Click the button below to open the store page, then click Add to Cart and complete the checkout. It will appear in your Steam Library once purchased.

3

Install the Game

Open your Steam Library, find 7 Days to Die, and click Install. Steam will download and install the game automatically. The full game is several GB, so this may take a while depending on your connection.

Once the install finishes, do not launch the game yet — we need to add the mods first.

Step 02

Install the Mod Pack

The Cork Connect server requires a mod pack. It's a single folder from MEGA — download it and drop it into your game's Mods directory.

1

Download the Cork Connect Mod Pack

Click below to open the MEGA folder. Download the 7 Days to Die mod pack — this contains all the mods pre-configured for our server.

2

Find Your 7 Days to Die Game Folder

In Steam, right-click 7 Days to Die in your Library → Manage → Browse local files. A File Explorer window will open at the game's installation directory.

The path is usually:
C:\Program Files (x86)\Steam\steamapps\common\7 Days To Die
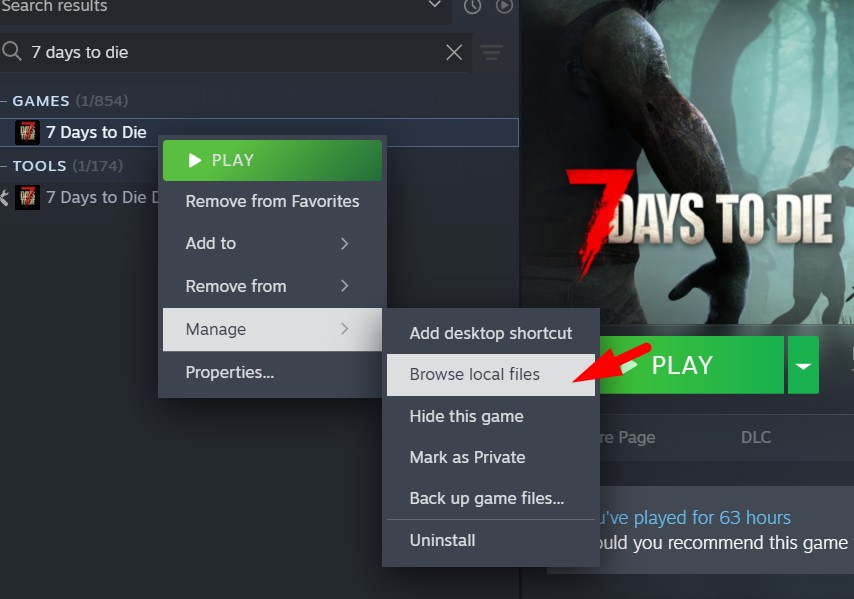
Right-click 7 Days to Die in Steam and select Manage → Browse local files
3

Copy the Mods into the Mods Folder

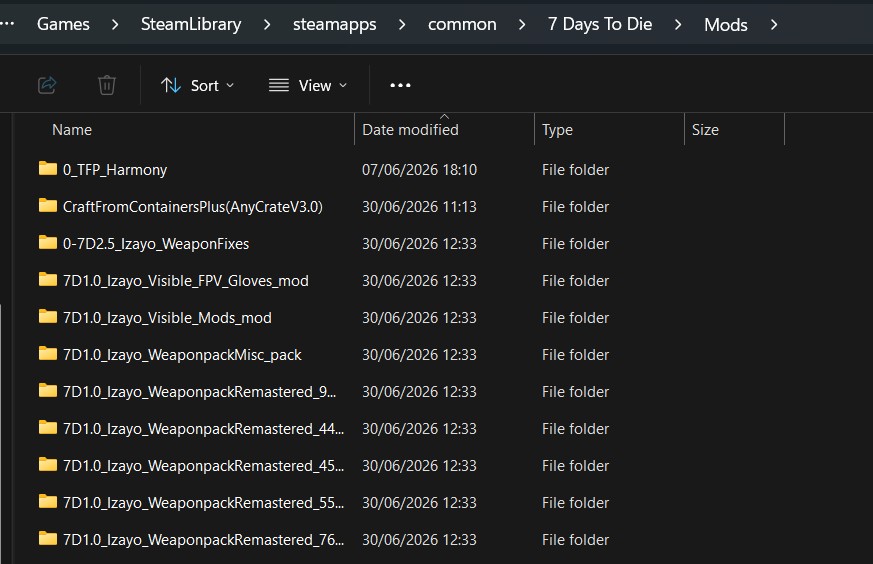
Inside the game folder, open (or create) the Mods folder. Extract the downloaded mod pack and copy its contents into Mods — each mod should be its own subfolder inside it.

The final structure should look like:
7 Days To Die\Mods\ModName\ModInfo.xml

7 Days to Die Mods folder showing installed mod subfolders
Step 03

Join the Server

The server runs 24/7. Launch 7 Days to Die, navigate to the server browser, and connect via IP.

1

Launch 7 Days to Die

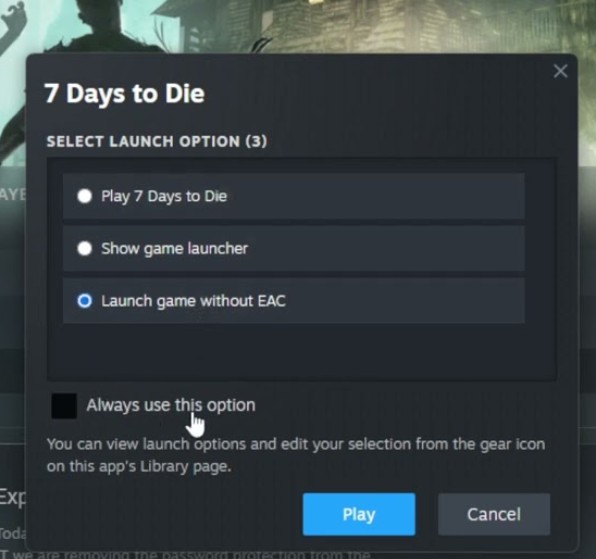
Start the game from your Steam Library. Steam may prompt you to choose a launch option — if so, see step 2.

7 Days to Die main menu
2

Select Launch Without EAC

If Steam shows a launch option prompt, select Launch game without EAC. Easy Anti-Cheat is not compatible with mods and will prevent you from joining the server.

Steam launch options with 'Launch without EAC' selected
3

Open the Multiplayer Menu

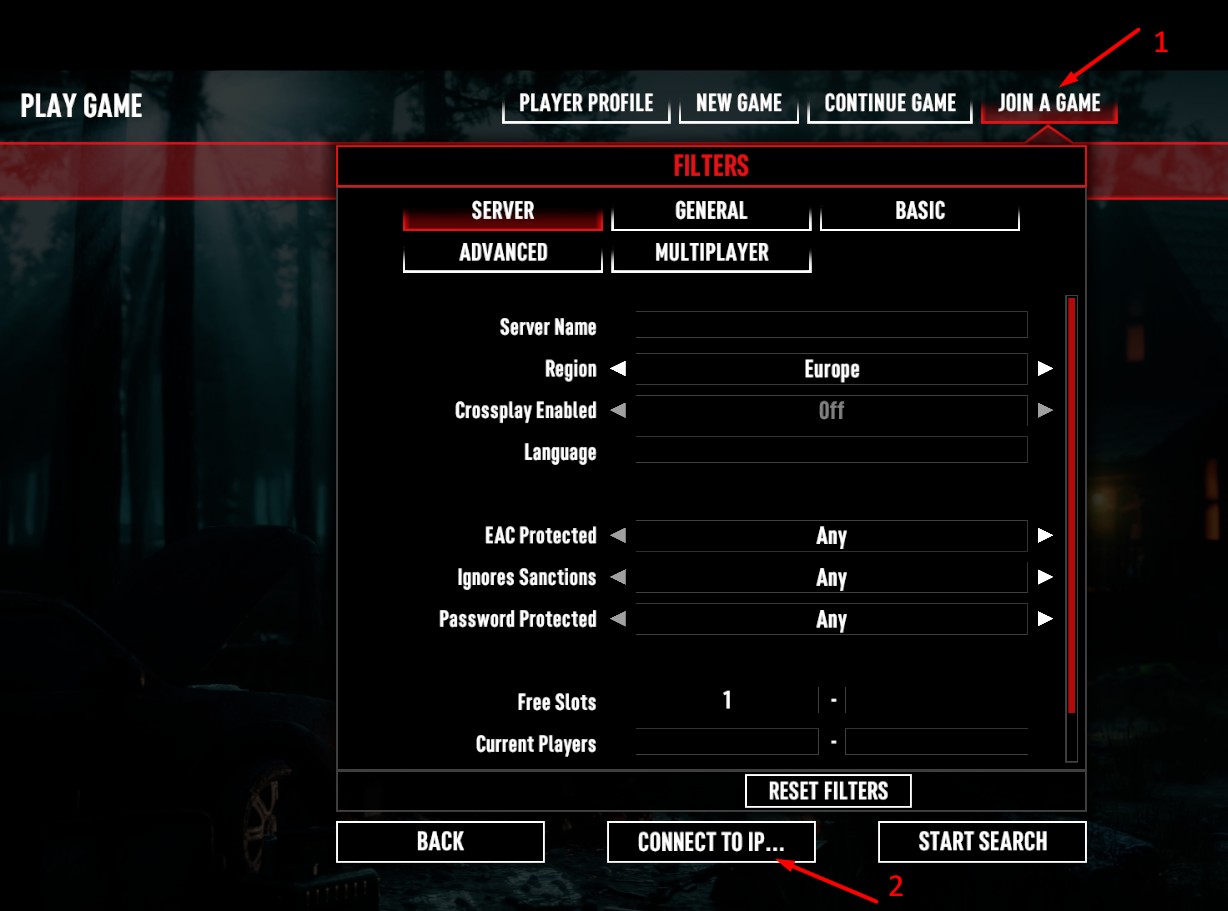
From the main menu, click Play Game, then select the Join a Game tab. At the bottom of the screen, click Connect to IP…

Join a Game tab with Connect to IP button highlighted
4

Connect via IP

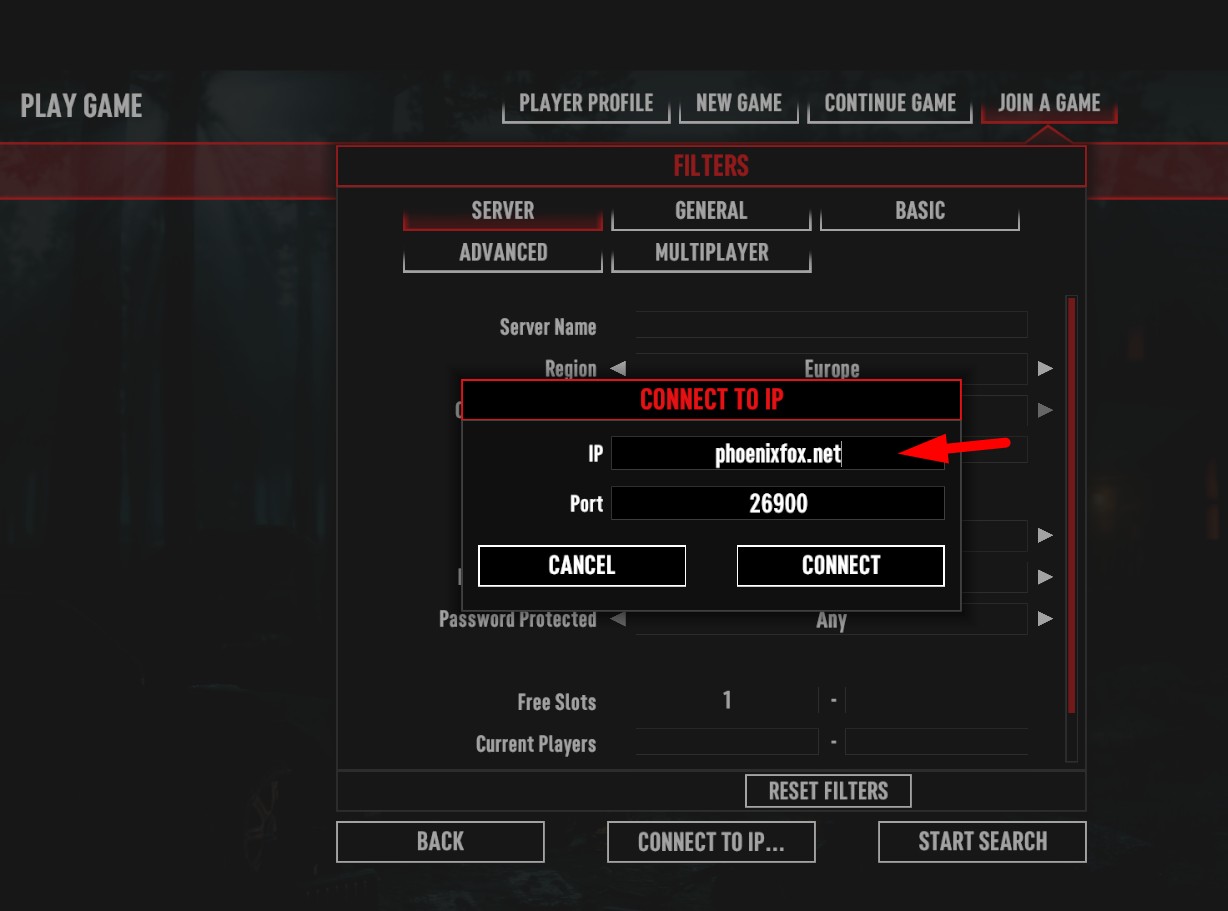
In the server browser, click Connect to IP. Enter the server address and port below, then click Connect.

Server Address
phoenixfox.net
Port: 26900  (default — enter in the Port field)
Connect to IP dialog with phoenixfox.net and port 26900 entered
5

Enter the Server Password

When prompted for a password, check the Cork Connect Discord server. The password is pinned in the #gamers-👾 channel — same password as the Valheim server.

The password is pinned in the Cork Connect Discord server. Check the #gamers-👾 channel before joining.

Can't Find the Server?

If the server doesn't appear in the browser or fails to connect, make sure you're entering the address as phoenixfox.net with port 26900 in the dedicated IP/Port fields. Also verify your game is fully up to date — running an outdated version will prevent joining.